This article describes how to connect your Irish Domains registered domain to Shopify for web hosting.
To access DNS records for your domain, first log on to your Irish Domains account.
STEP 1
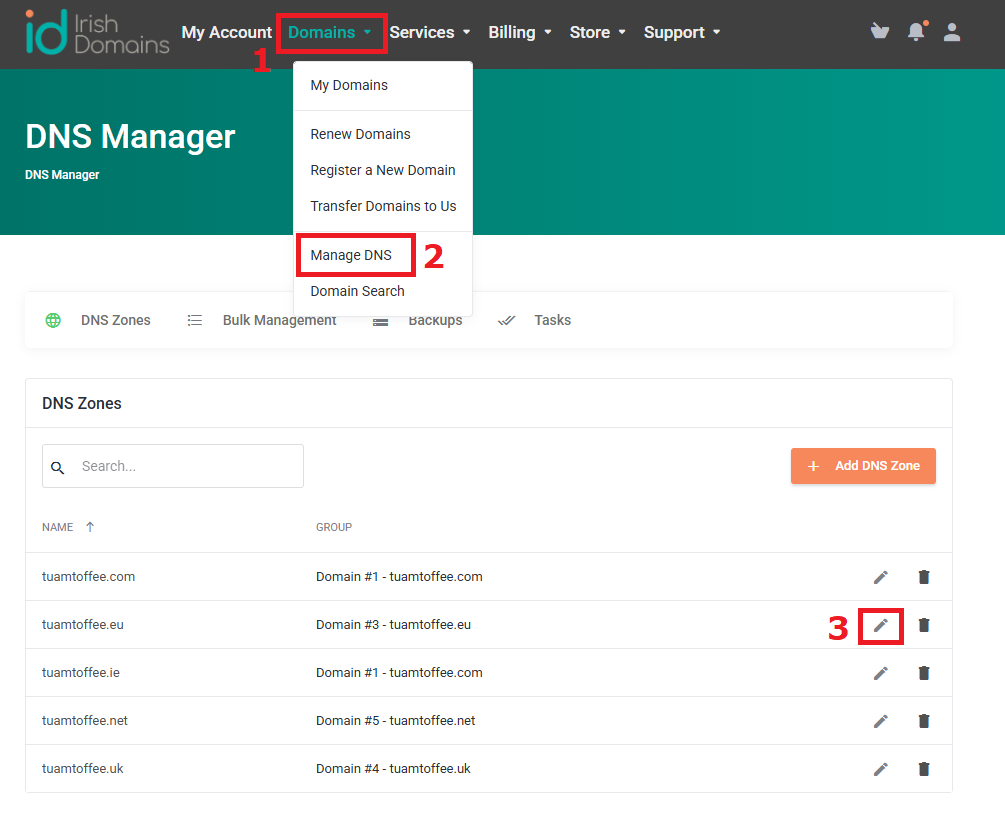
Firstly, you should access the DNS records for your domain (we'll use the domain tuamtoffee.eu for our example)
Click "Domains" [1] -> "Manage DNS" [2] and click the "Edit DNS Zone" [3] icon beside your domain.
There are two common situations, where you will use a subdomain for your site, or else where you will have Shopify as your main website.
STEP 2A
Where you want to use a subdomain like "shop.tuamtoffee.eu" for your Shopify site:
In this case, you simply need to add a single CNAME record for the subdomain.
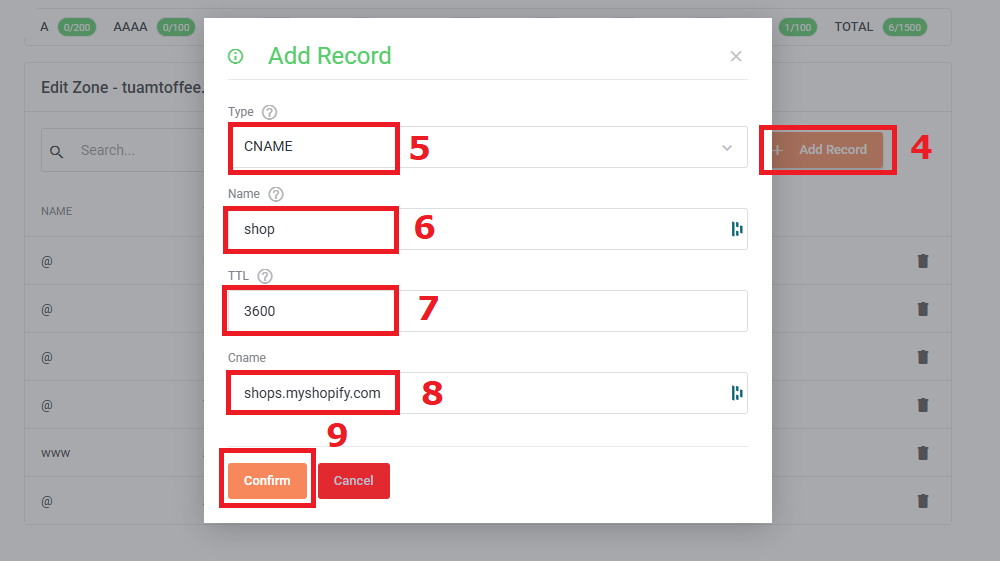
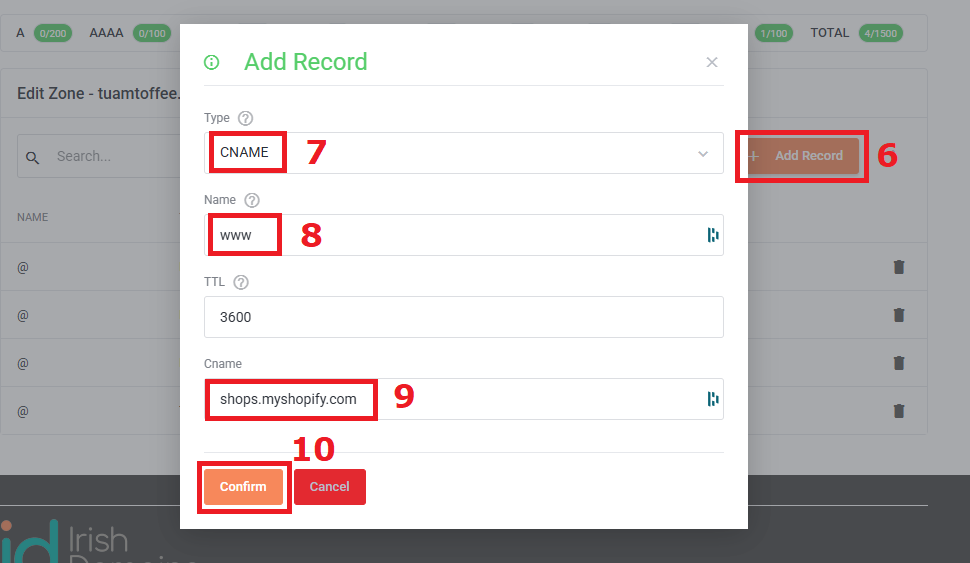
Click "Add Record" [4], then create a record of type CNAME [5] named the same as your subdomain but without the domain itself, e.g. "shop" [6]
The record should point to "shops.myshopify.com" [8] and you can leave the TTL [7] as default, click "Confirm" [8] to save.
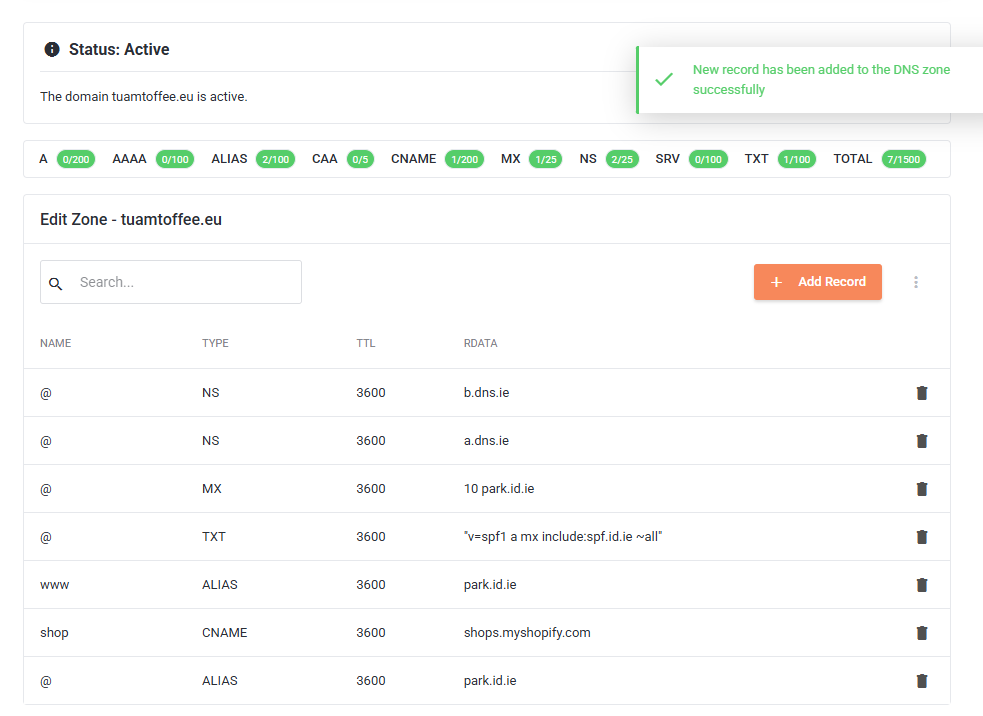
If it is successful, the records should look as below (your main web and mail records may differ).
STEP 2B
Where you want to have the Shopify site as your main website, e.g. "www.tuamtoffee.eu"
In this case, you will need to remove any current parking or hosting records for your domain add a CNAME and A record pointing to shopify.
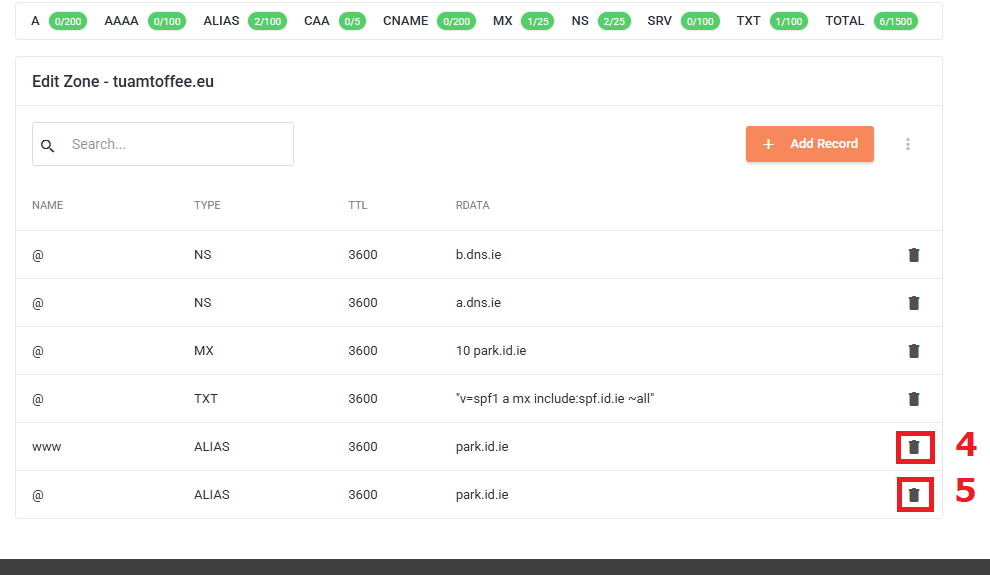
Firstly, if there are existing ALIAS records pointing your site to our parking server (park.id.ie) or hosting servers (someserver.hosting.ie), those need to be removed.
In the example below, simply click on the delete icon beside the two ALIAS records to remove them [4] [5].
Next, you should add the CNAME record for the www domain.
Click "Add Record" [6], then create a record of type CNAME [7] named "www" [8]
The record should point to "shops.myshopify.com" [9] and you can leave the TTL as default, click "Confirm" [10] to save.
Lastly, you should add the DNS "A" and "AAAA" records to ensure the non-www domain points to the same site.
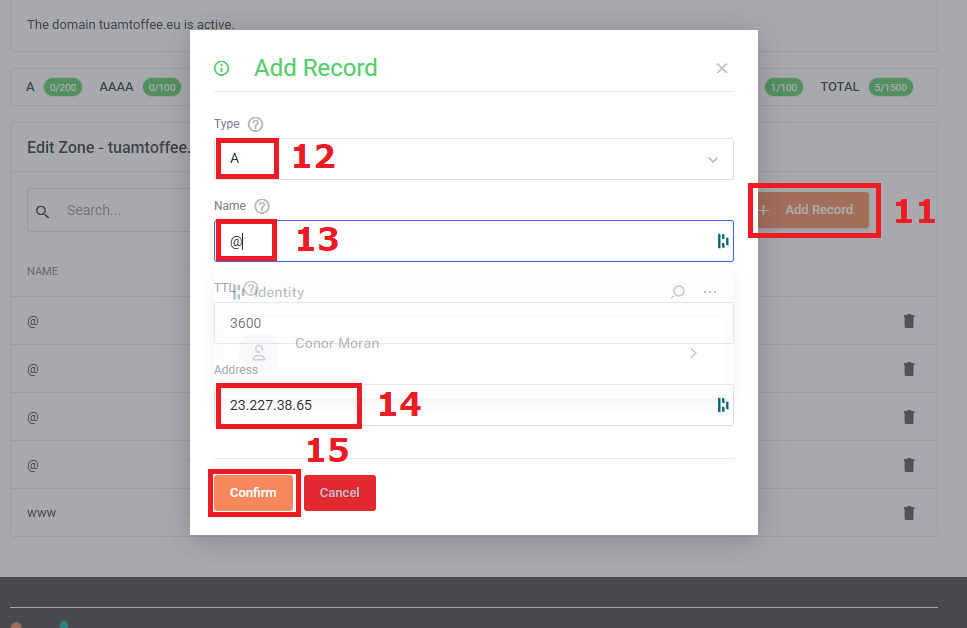
Click "Add Record" [11], then create a record of type "A" [12] named "@" [13]
The record should point to "23.227.38.65" [14] and you can leave the TTL as default, click "Confirm" [15] to save.
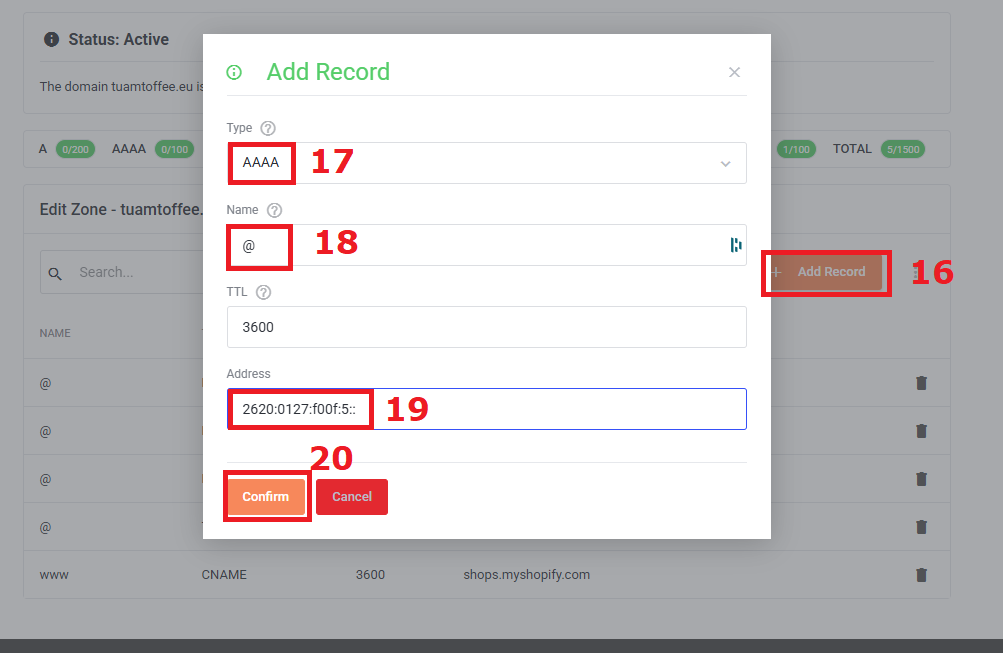
Click "Add Record" [16], then create a record of type "AAAA" [17] named "@" [18]
The record should point to "2620:0127:f00f:5::" [19] and you can leave the TTL as default, click "Confirm" [20] to save.
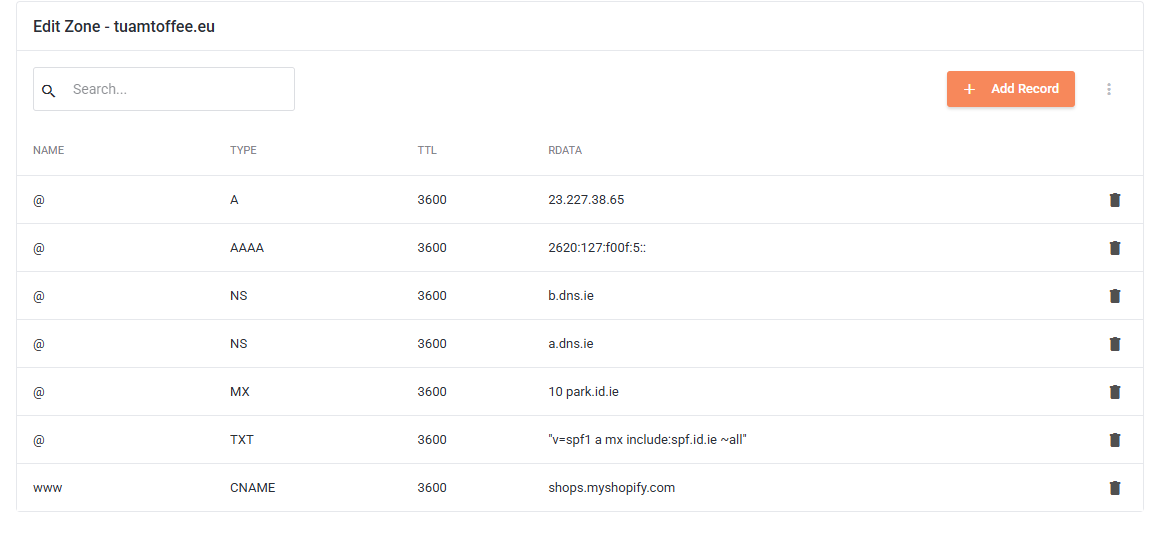
If it is successful, the records should look as below (your mail records may differ).
STEP 3
Allow an hour or two for the DNS records to become visible everywhere.
After that time, you can continue to connect and/or configure your website with Shopify.
Shopify Help Center | Connect your third-party domain to Shopify manually
